Studio quick start#
This page makes a presentation in FrameSeq Studio from start to finish, the way you would in PowerPoint: start from a template, add slides, insert and arrange things with the mouse, then present it and export it to PowerPoint or PDF. You never have to read the code. It stays in the window, one click away, and every click you make is written into it.
Install the app#
Download FrameSeq from the download page, which offers the file for your computer: an installer for Windows, a disk image for macOS, and an archive for Linux. The app brings everything it needs, Node.js, Typst, and Tectonic included, so there is nothing to install first, and it keeps itself up to date.
Open FrameSeq Studio from the Start menu, Applications, or the applications menu. The installers are not signed yet, so Windows or macOS may ask before the first start; FrameSeq app says what to do.
Start a presentation#
The Studio opens on its start page. Choose New presentation, type a title, pick a template, and choose a folder; double-clicking a template creates the presentation at once. The templates are shown by their real covers: Blank, Midnight for a dark talk, Paper for serif pages, an Academic talk, three Beamer lectures, and an A0 Poster.
The presentation is one file, named after its title, such as quarterly-review.slides.ts for Quarterly review. Open… opens one you already have, and the start page lists the ones you opened recently. The Studio saves by itself shortly after each change, and Ctrl+S saves at once.
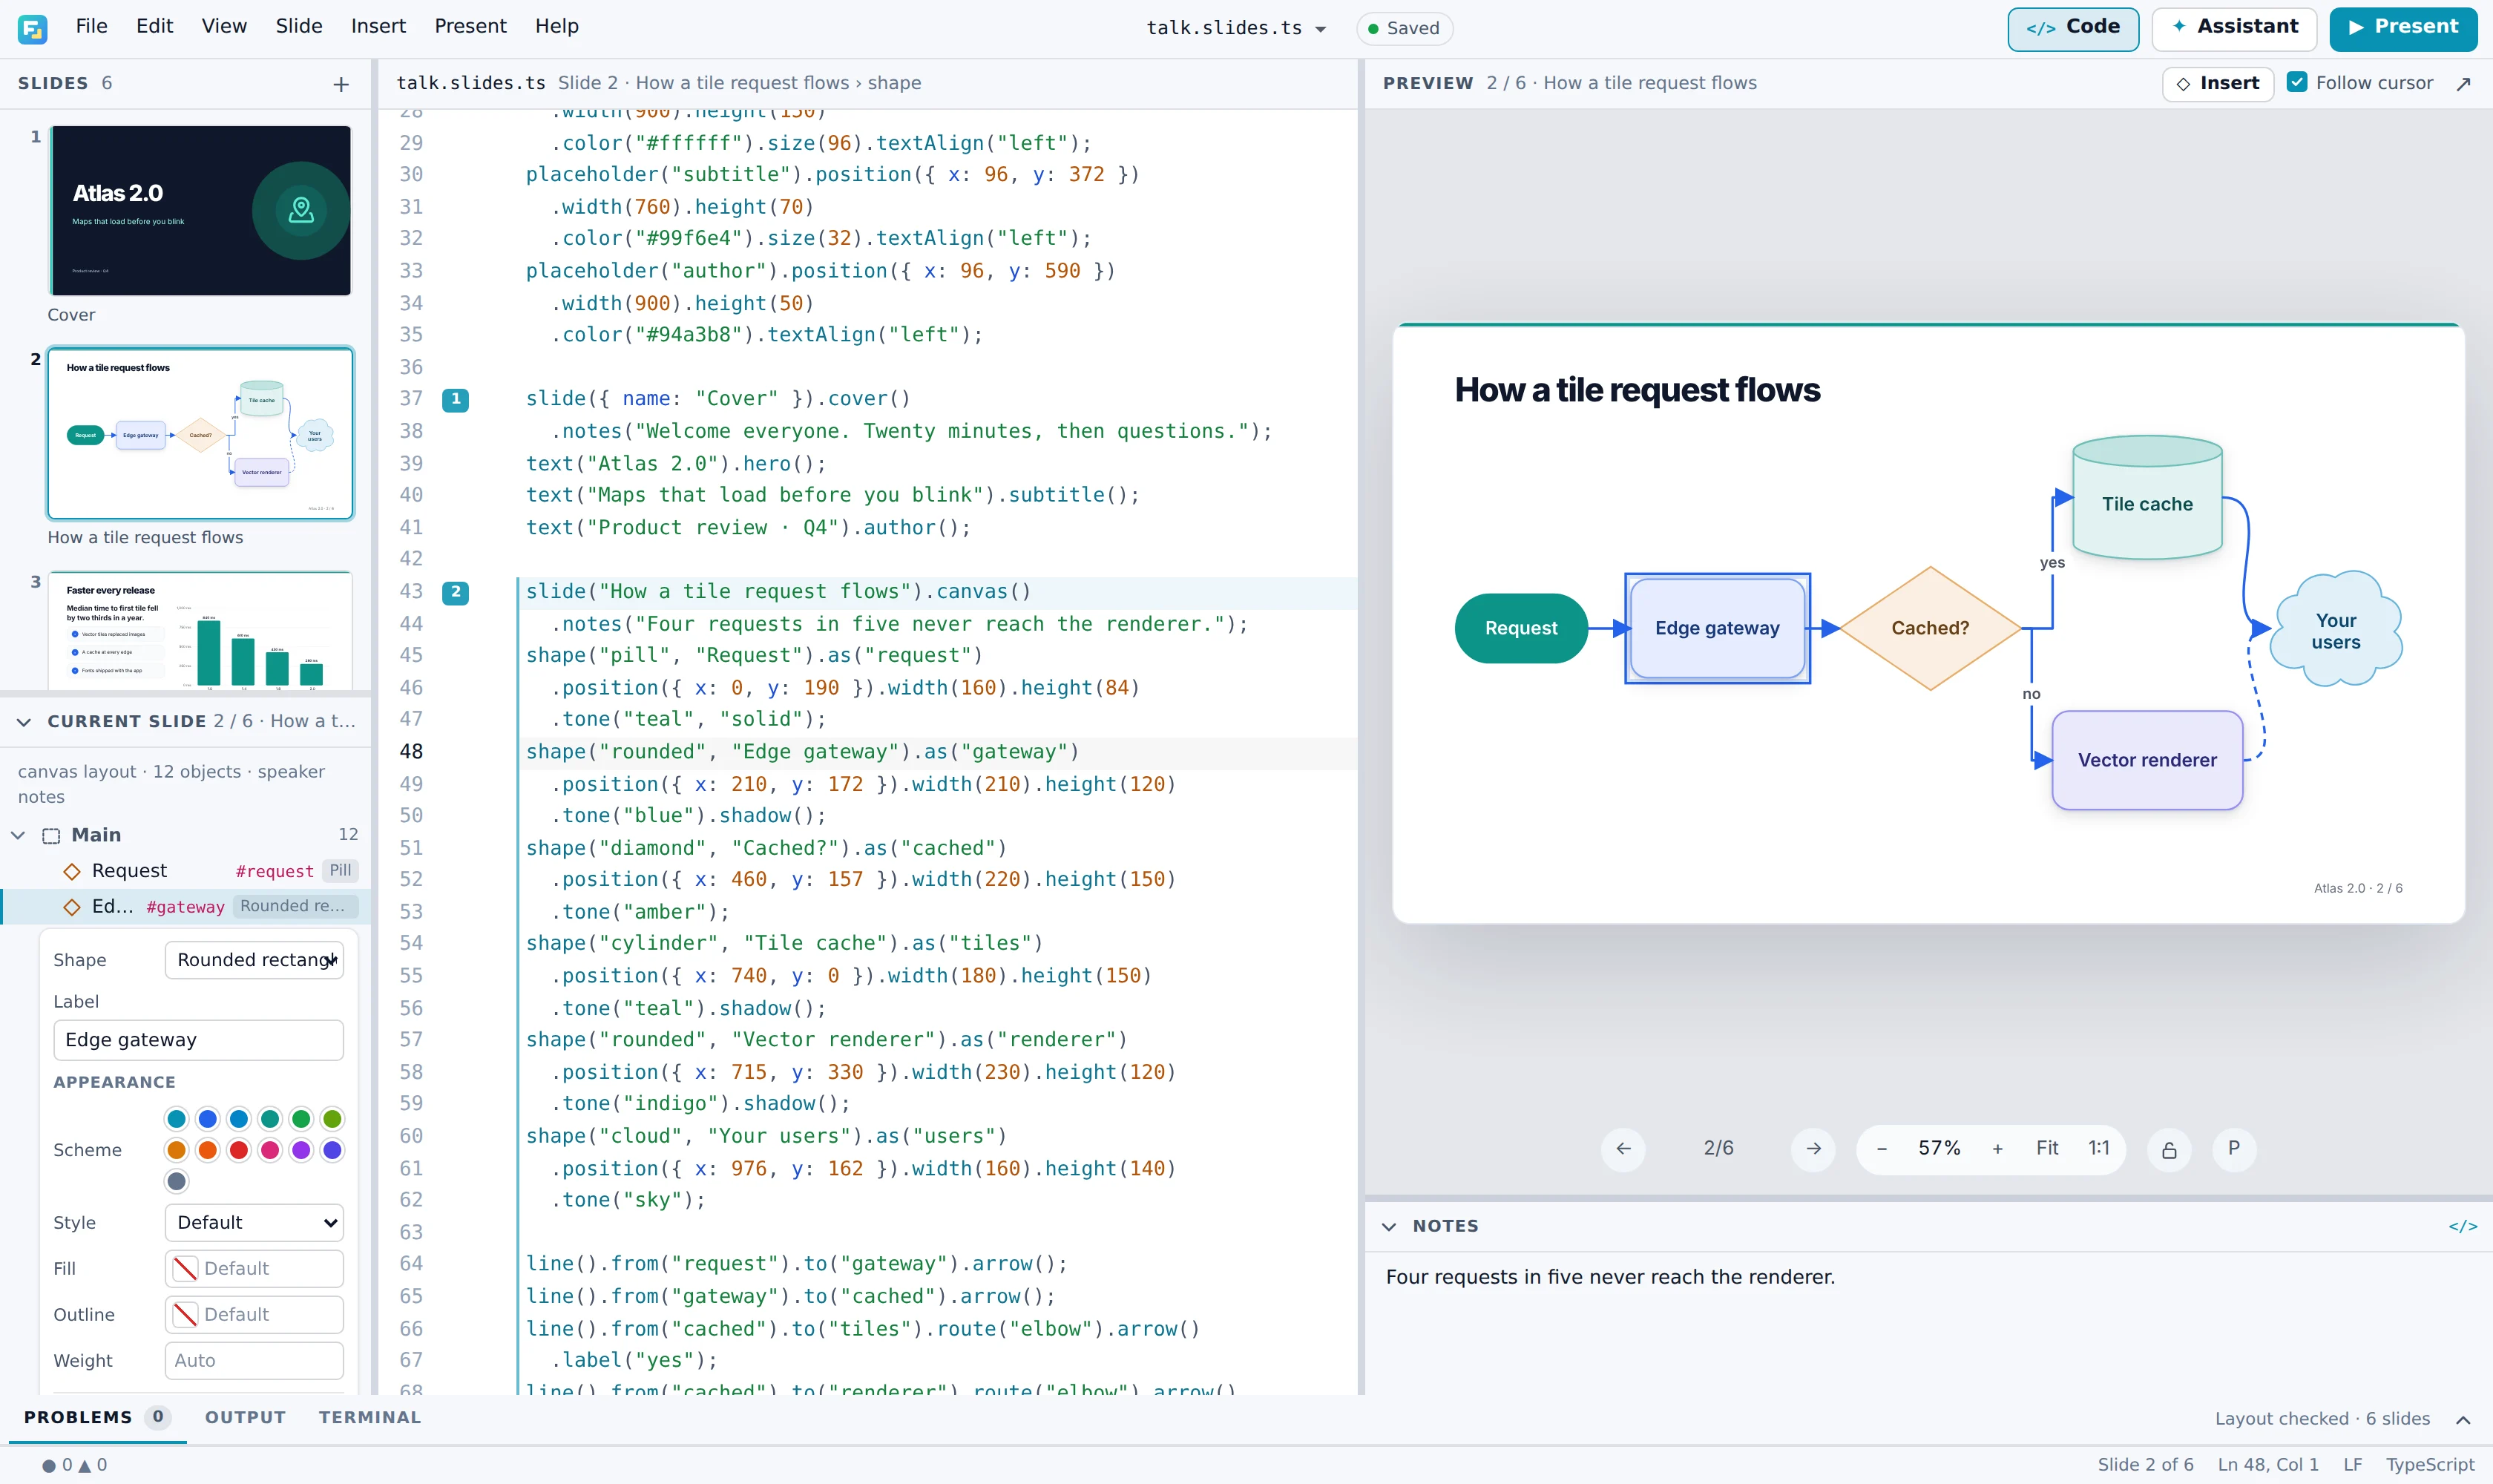
Find your way around#
| Where | What it holds |
|---|---|
| Left | The slides, and below them Current slide: the objects on the slide, and the settings of the one selected. |
| Middle | The code the slides are made from. |
| Right | The slide you are working on, with its speaker notes below it. |
| Bottom | The status bar, which counts the problems the Studio finds. |
To work without the code, click Code in the top bar or press Ctrl+E: it folds away and the slide takes its room. Everything on this page works either way. The Studio speaks English and Chinese, and View › Language switches between them.
Add slides#
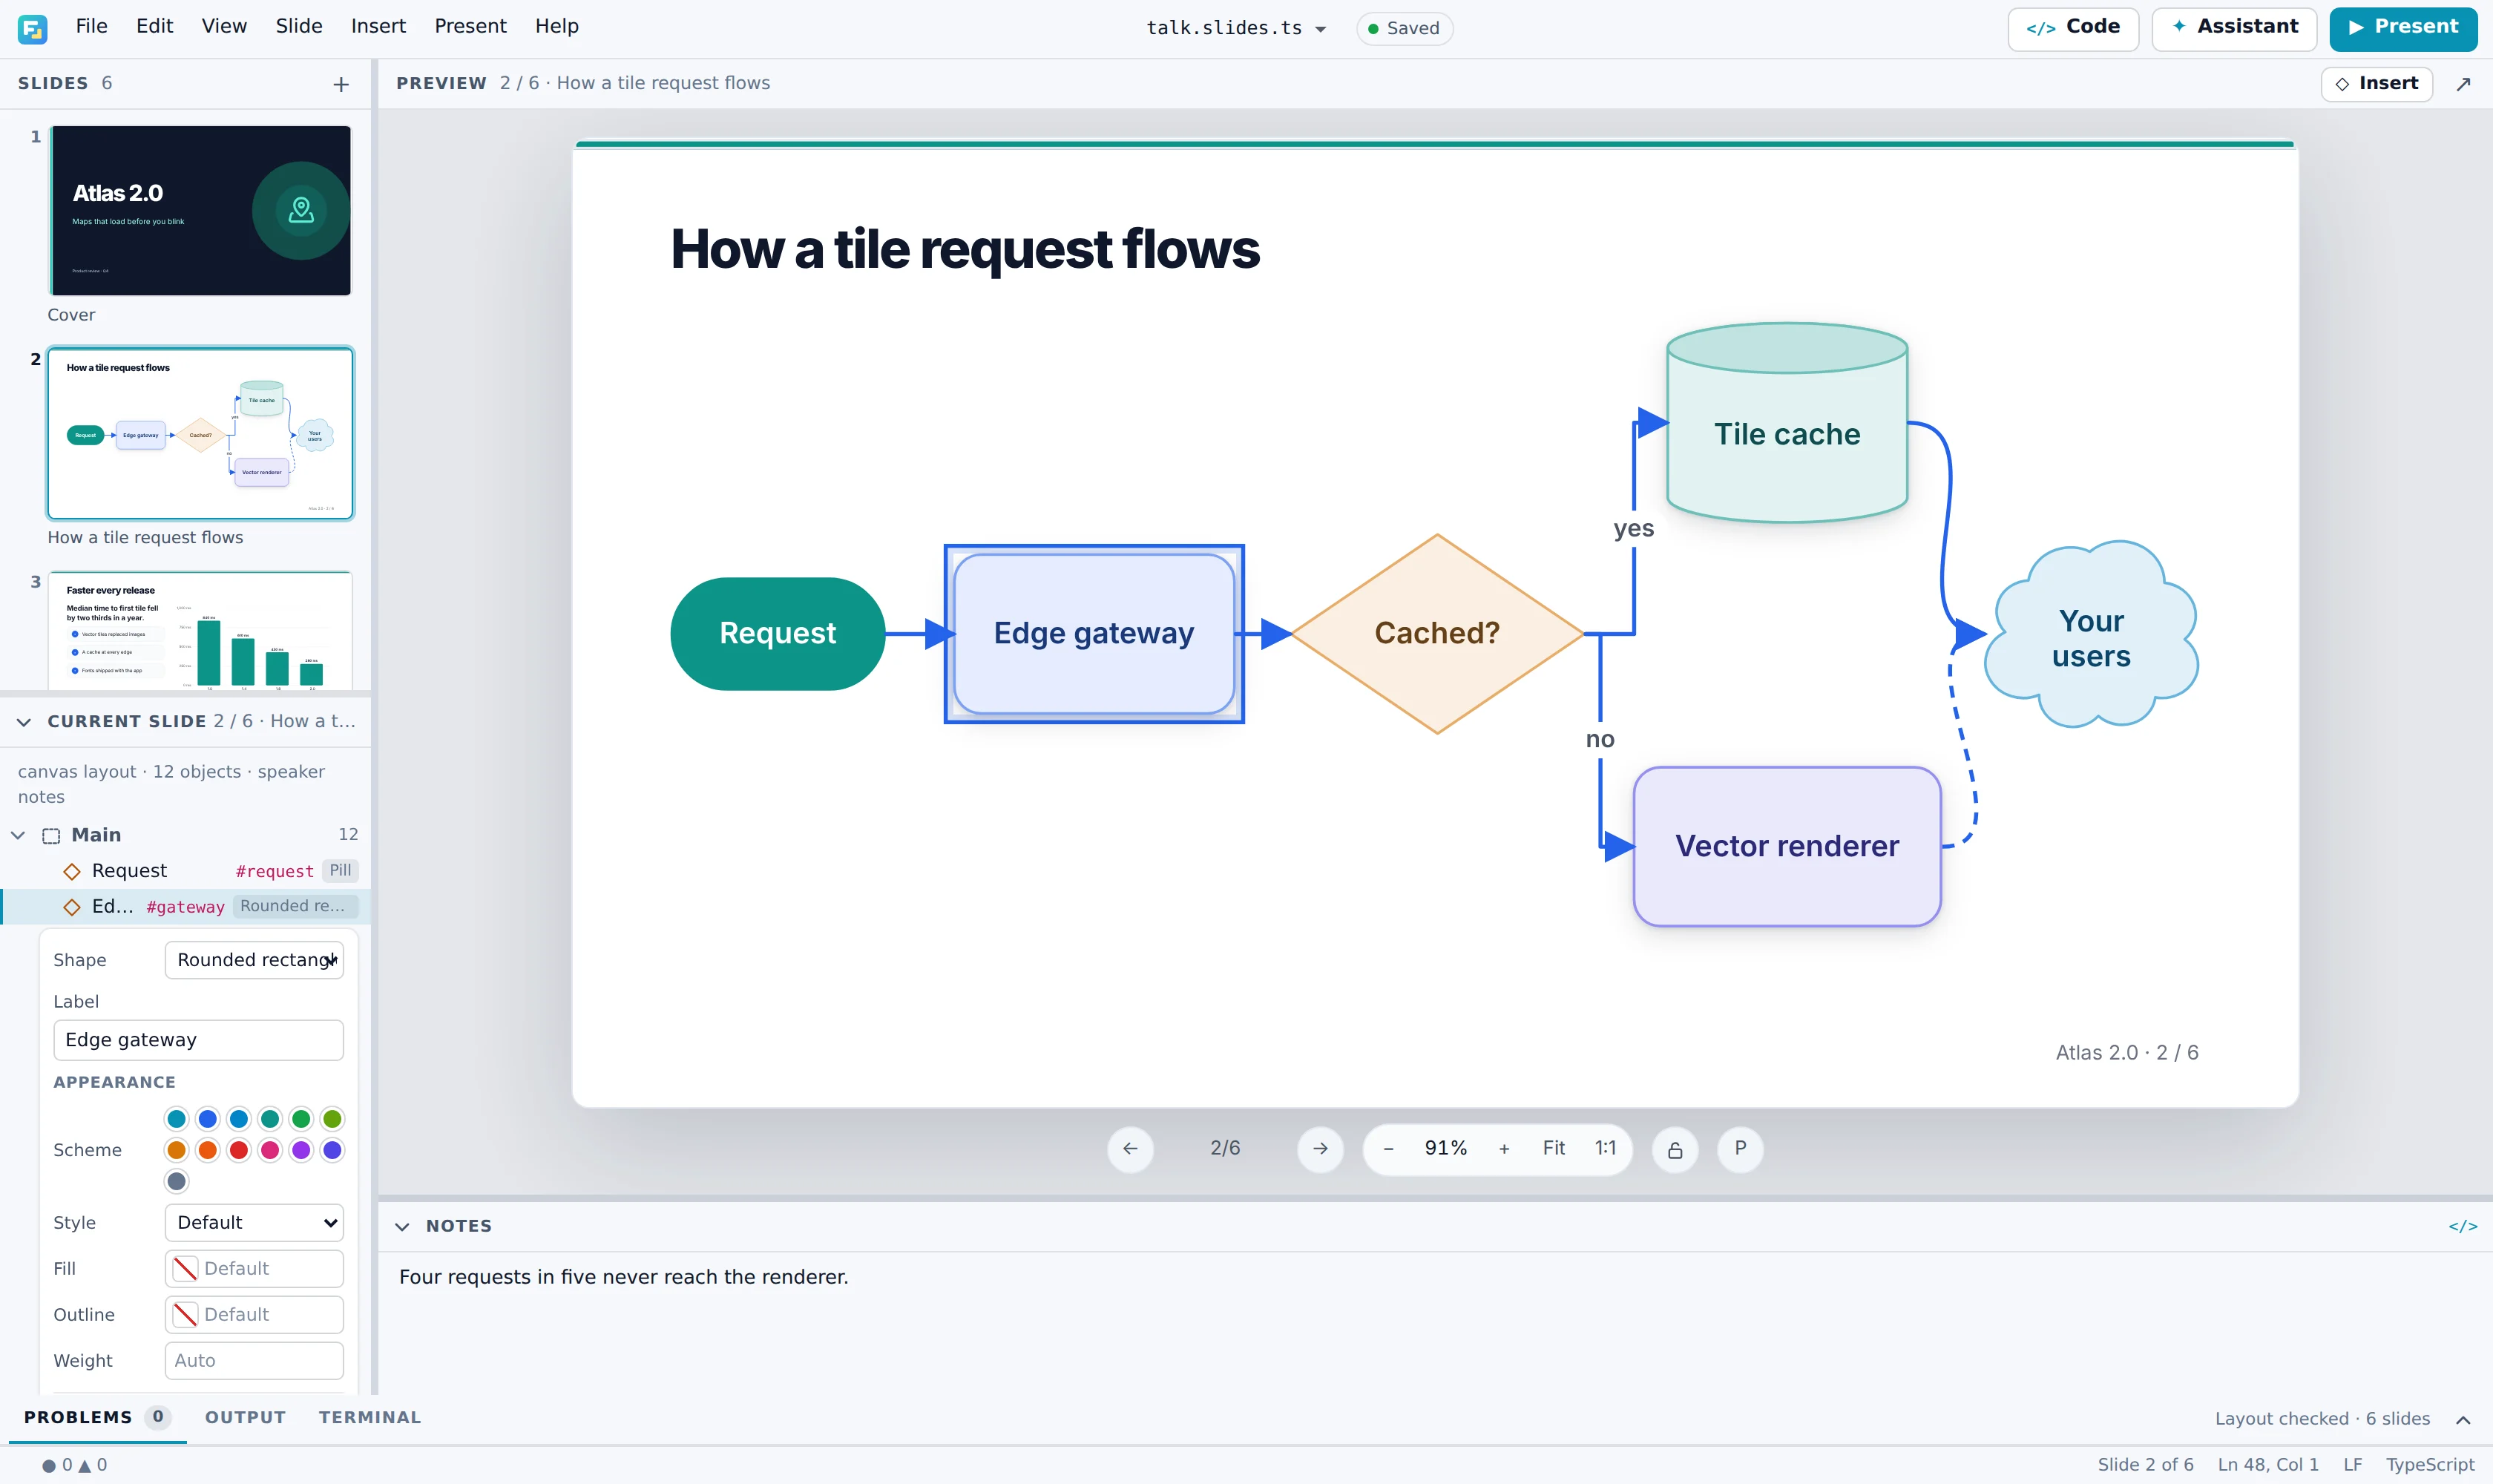
Click + above the slides to add one after the current slide, from a layout: title and text, title and points, a section title, two columns, three numbers, code and notes, a formula, a table, a chart, a flow diagram, steps revealed one by one, or a closing line. The new slide's title comes selected, so typing replaces it.
Drag a thumbnail up or down to move its slide. Right-click it to duplicate, move, or delete the slide, or to present from it.
Insert and draw#
Insert, at the top of the slide and in the menu bar, opens a gallery with two sides.
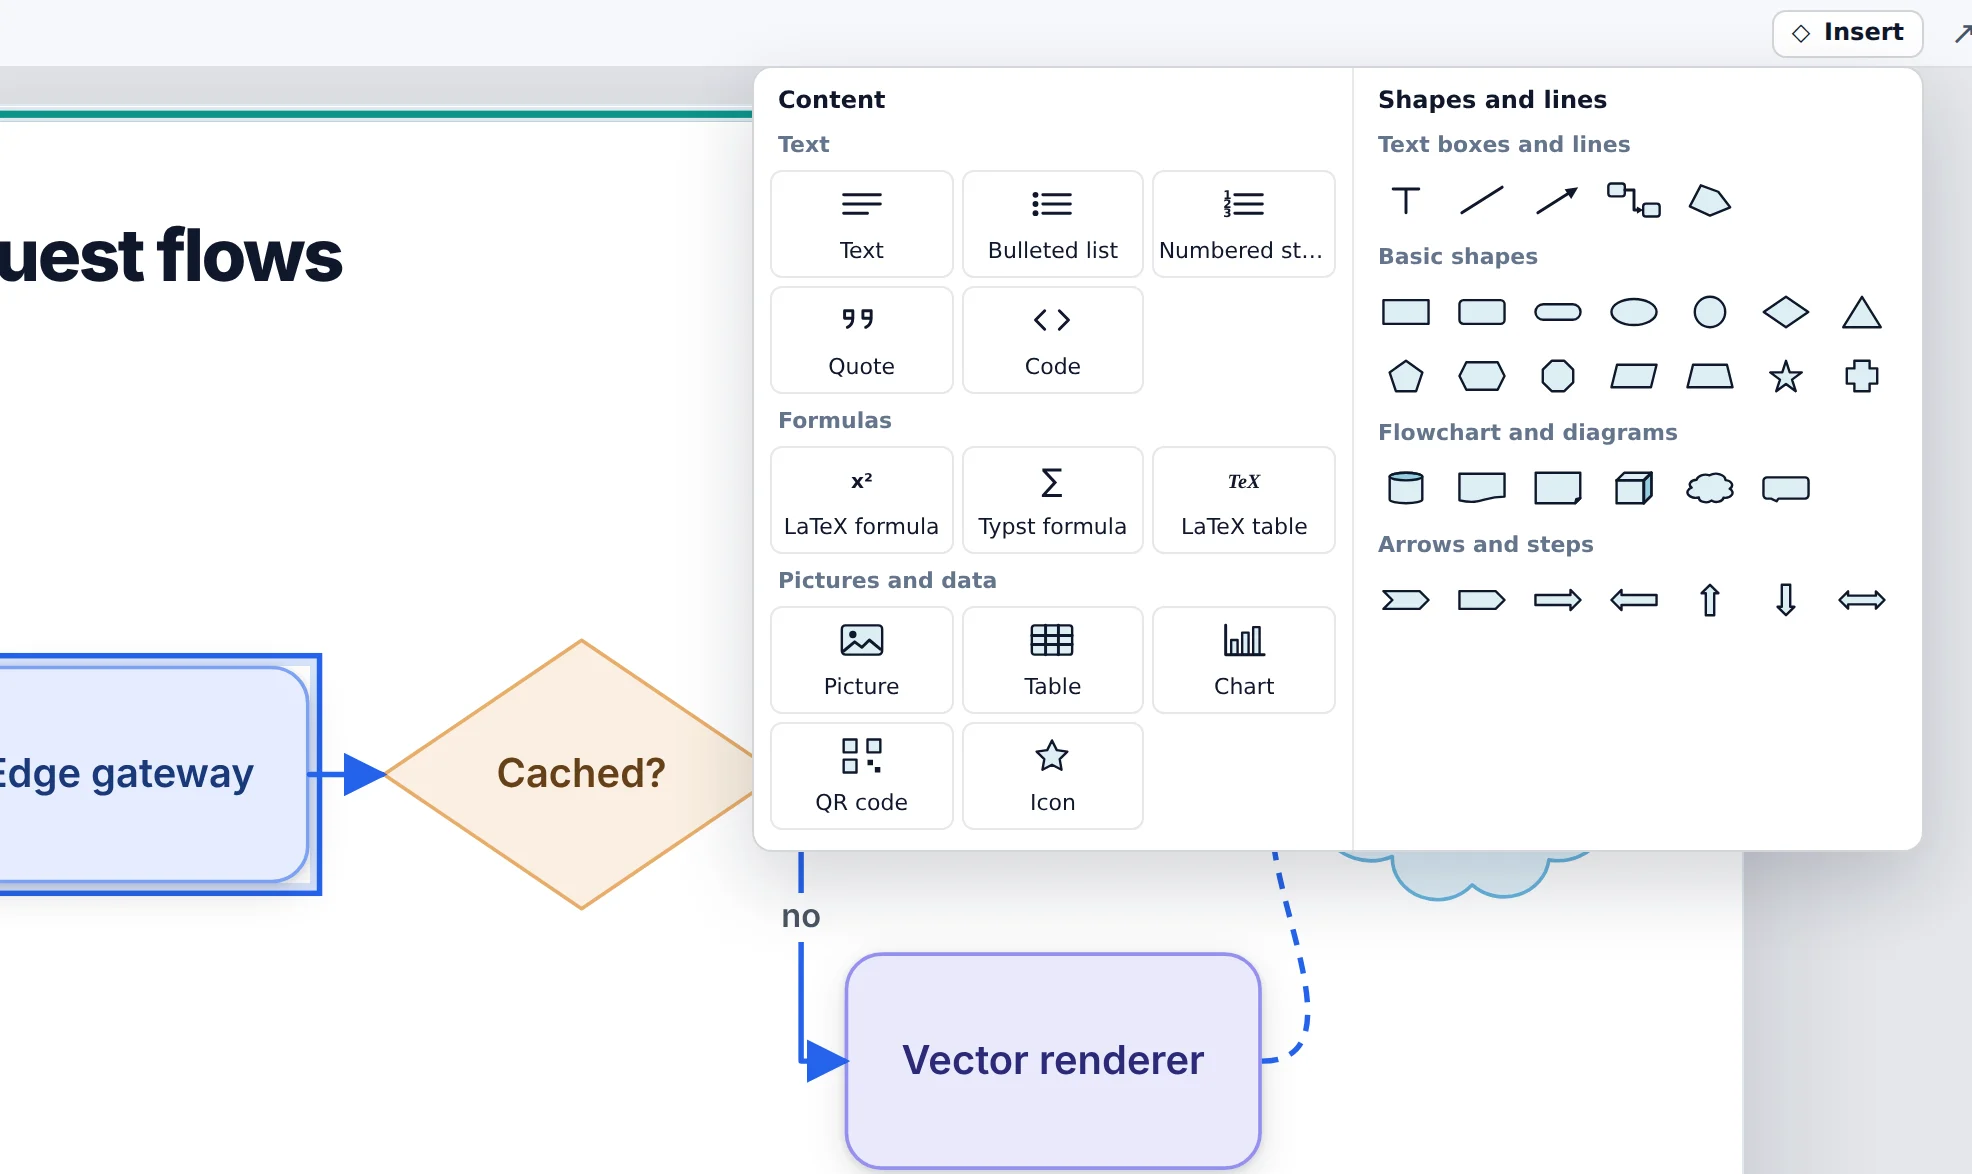
- Content, on the left: text, a bulleted list, numbered steps, a quote, code, a LaTeX or Typst formula, a LaTeX table, a picture, a table, a chart, a QR code, or an icon. It goes after the selected object and takes its place in the slide's flow, as text does in a word processor, so the slide stays laid out. Its sample words come selected: type to replace them.
- Shapes and lines, on the right: a text box, a line, an arrow, a connector, and 27 shapes. Drag across the slide to draw one, or click to place it at its usual size;
Shiftkeeps a shape square. Drag a connector from one object to another, and it follows them wherever they move.
Picture asks for a file and copies it into an images folder beside the presentation, so the slides keep their pictures wherever the folder goes. Icon finds an icon by name, such as chart or user.
Select, move, and format#
Objects on the slide are worked on directly, as in PowerPoint:
- Click an object to select it, and
Ctrl-click to add others. - Drag an object you drew to move it, the handles on its sides and corners to resize it, and the round one above it to turn it. Drag one in the slide's flow, such as a paragraph or a list, to change its place among its neighbours.
- Drag across the slide's empty part to select every object inside the box.
- Double-click words to type them where they are: a text, a list's item, a table's cell, a shape's label.
Enterkeeps them, andEscputs them back. - The padlock among the slide's controls locks the layout, so nothing moves by accident while you work on the words.
Deletedeletes the selection, andCtrl+C,Ctrl+X,Ctrl+V, andCtrl+Dcopy, cut, paste, and duplicate it.- Right-click for the rest: the stacking order, aligning several objects, editing the text, and its format.
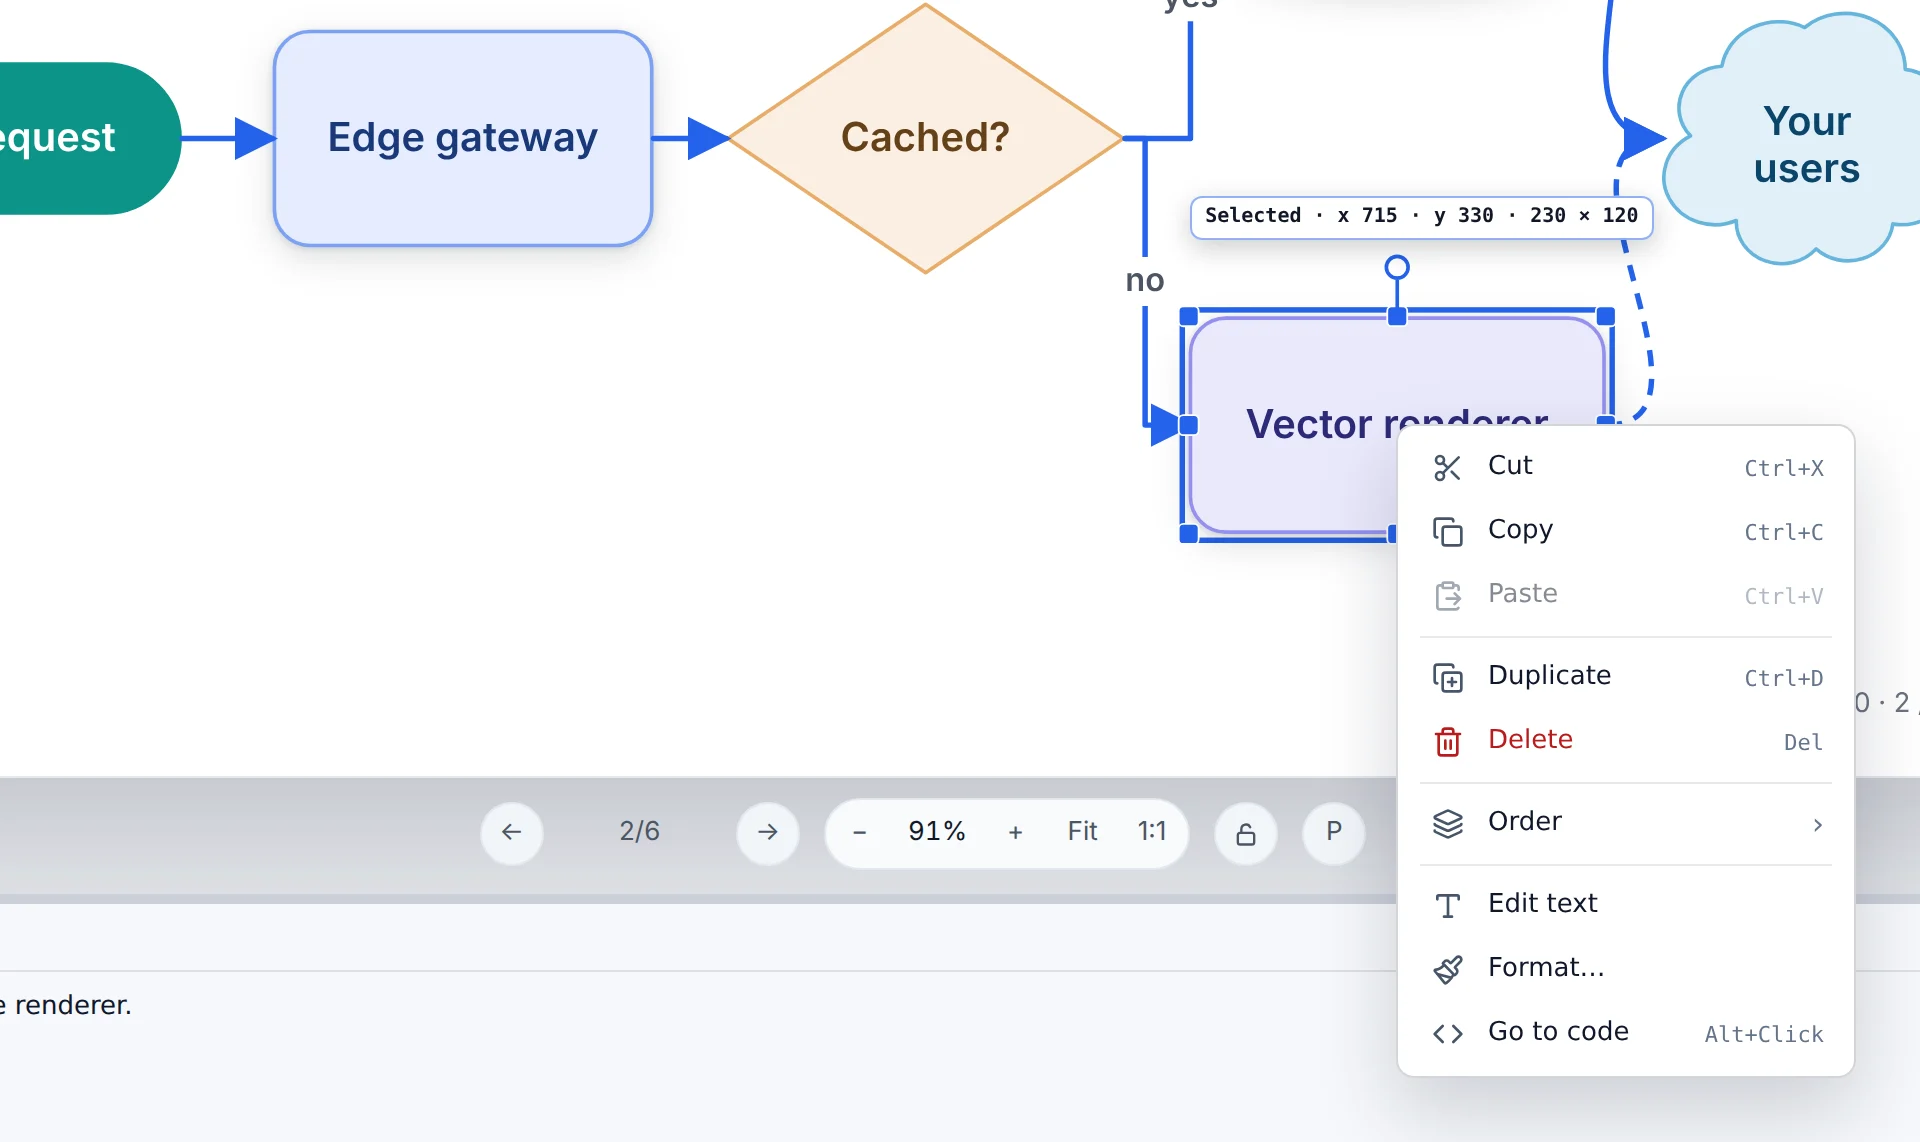
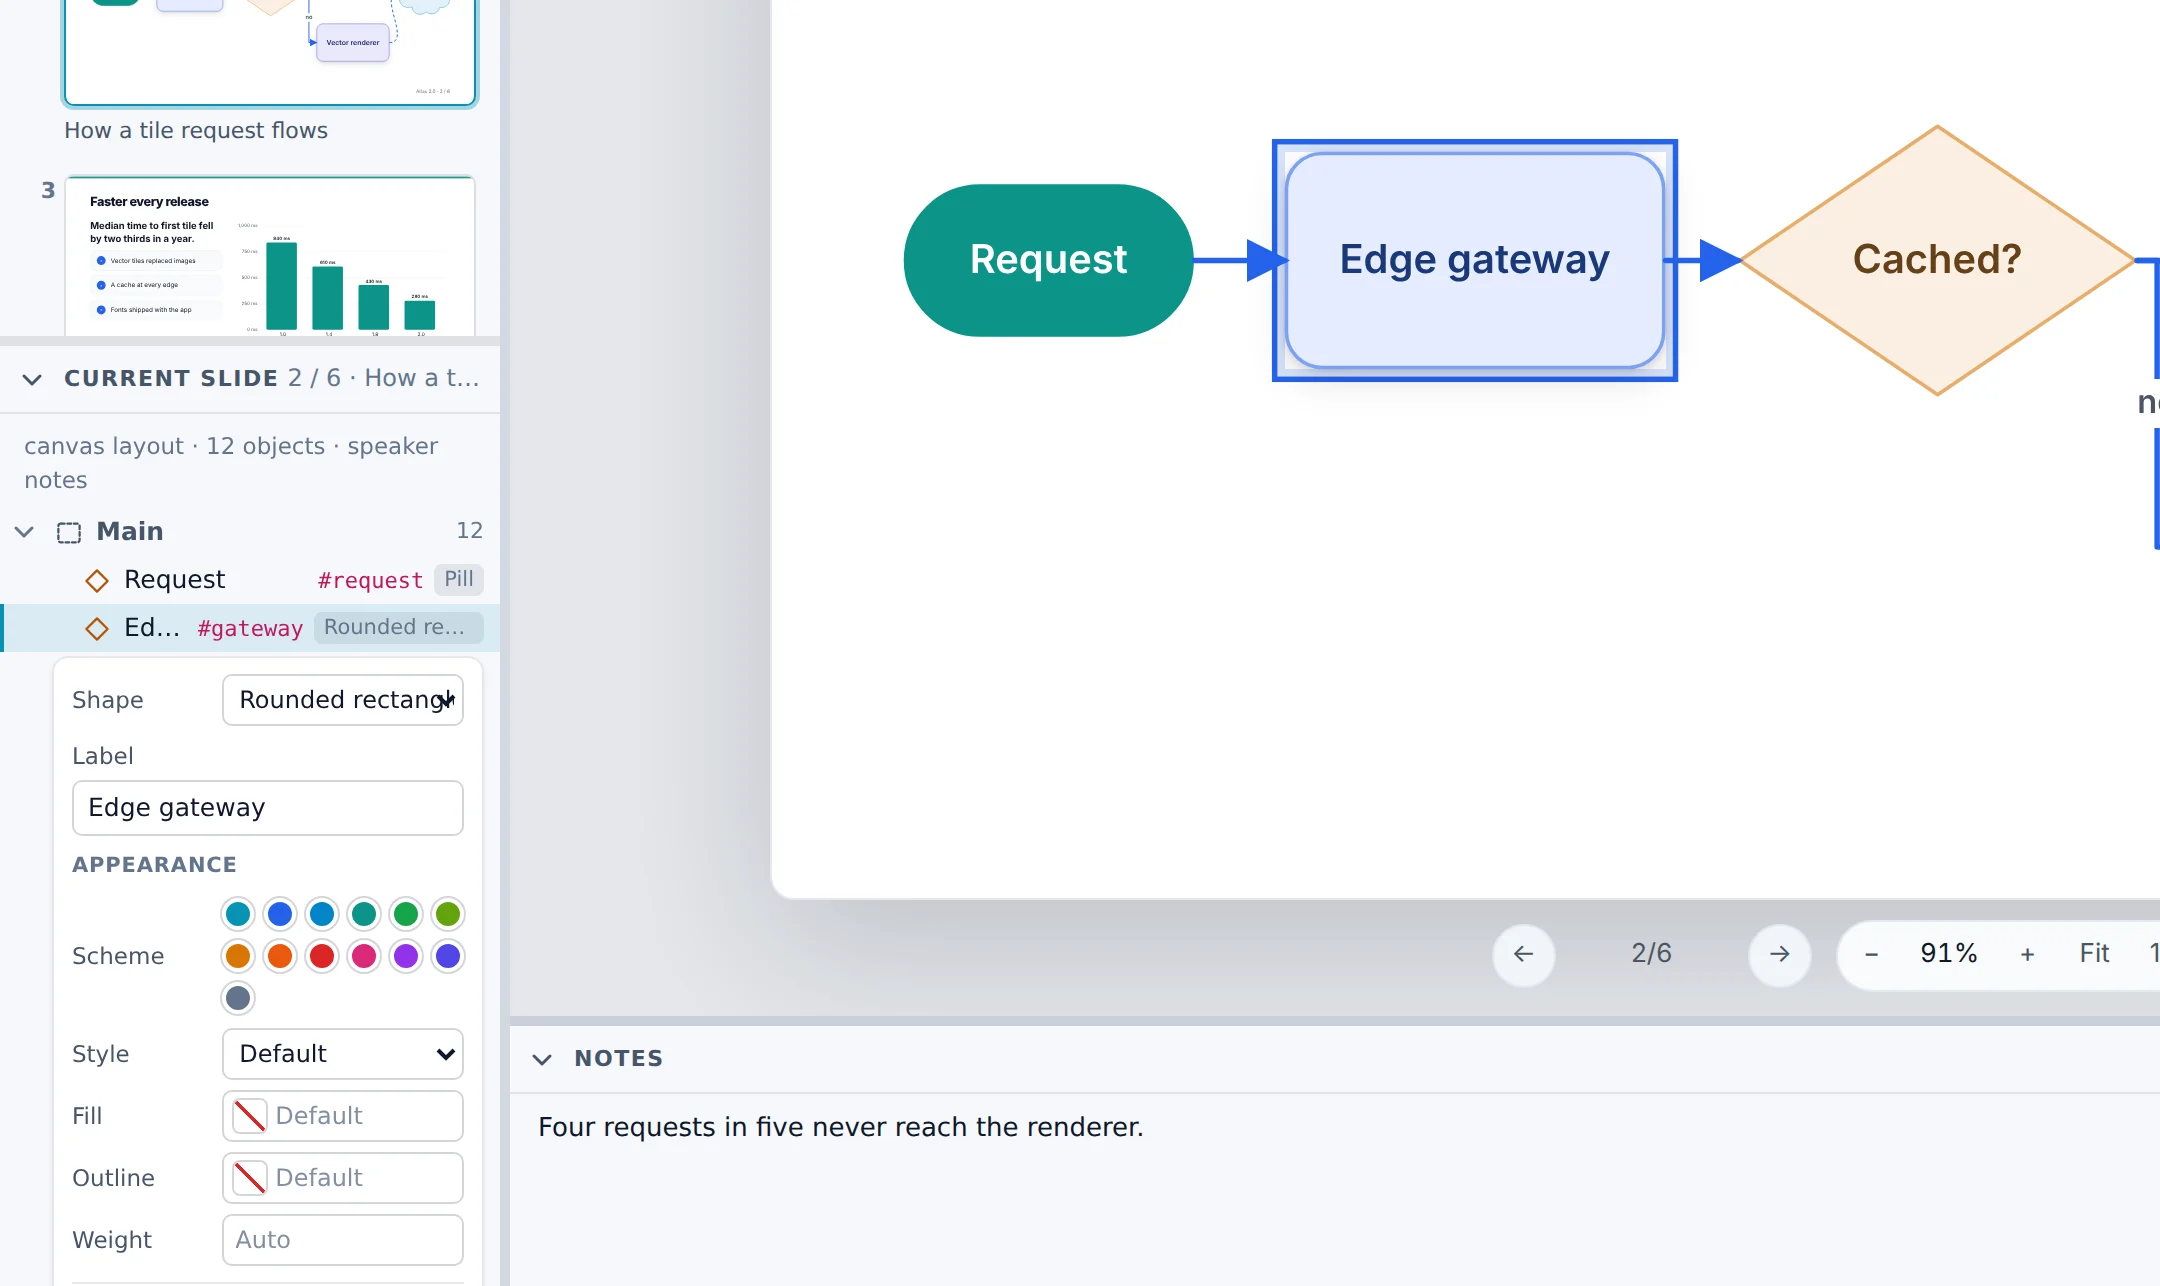
The selected object's settings open in Current slide, on the left, as a format pane does. Clicking an object's row there selects it too.
- Content: the words, a list's items, a formula's source, a picture's file, a shape's kind and label.
- Text: the style, such as heading, lead, or caption; the size, bold, colour, and alignment.
- Appearance: the background, fill, outline, corners, and opacity. A shape's colour scheme is one click.
- Size and Position.
Every change is one step: Ctrl+Z takes it back and Ctrl+Y puts it back.
Write speaker notes#
Below the slide, Notes holds the slide's speaker notes: click and type. They show in presenter view and travel into PowerPoint, and never appear on the audience's screen.
Fix what the Studio points out#
The Studio measures the slides as you work. Text that runs off its slide, text that is cut off, type too small to read, and an empty slide are counted in the status bar. Click the count, or press Ctrl+J, for the list, and click a finding to go to the object it is about.
The same look on every slide#
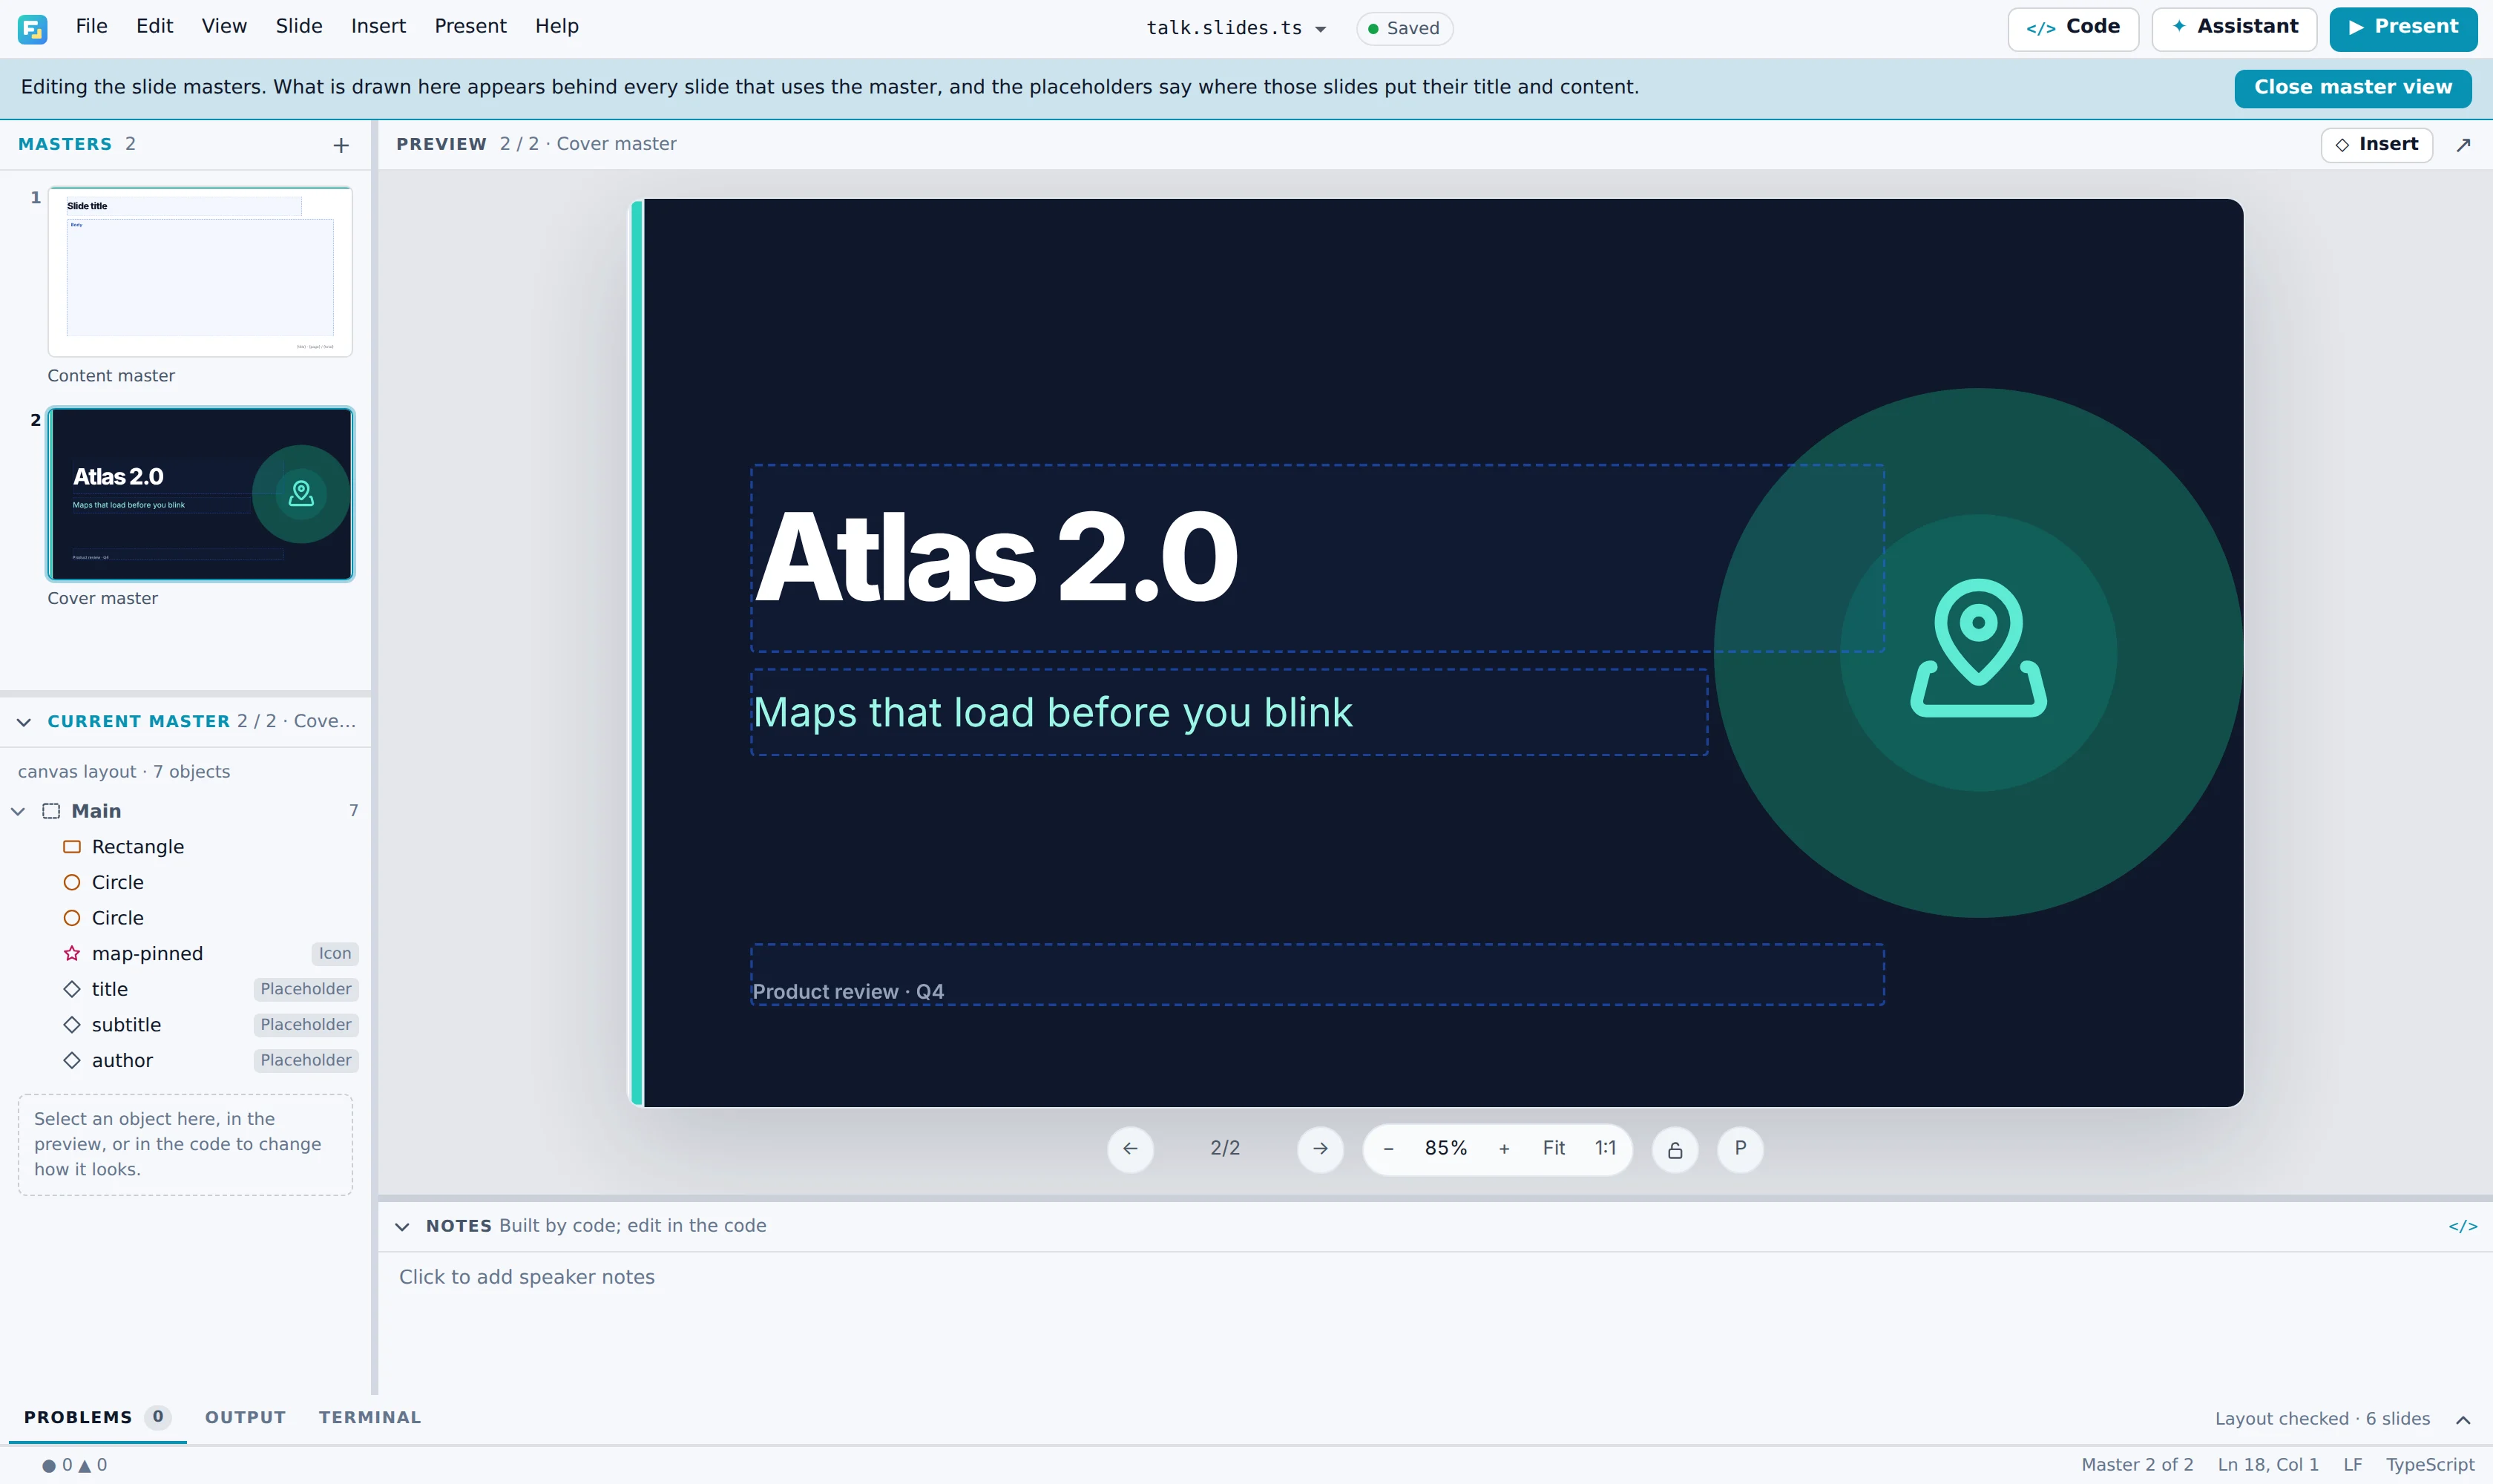
View › Slide master shows the masters the slides are drawn on. Put a logo, a footer, or a coloured band on a master, and every slide drawn on it follows; Insert › Placeholders decides where the slides' title, subtitle, author, and content go. File › Save as template… keeps the whole presentation, masters and theme included, as a template of your own, offered under My templates the next time you start a presentation. See Masters and templates.
Present#
Press F5 to show the slides from the current one, or Shift+F5 from the first. A click, →, or Space moves on, and Esc ends the show.
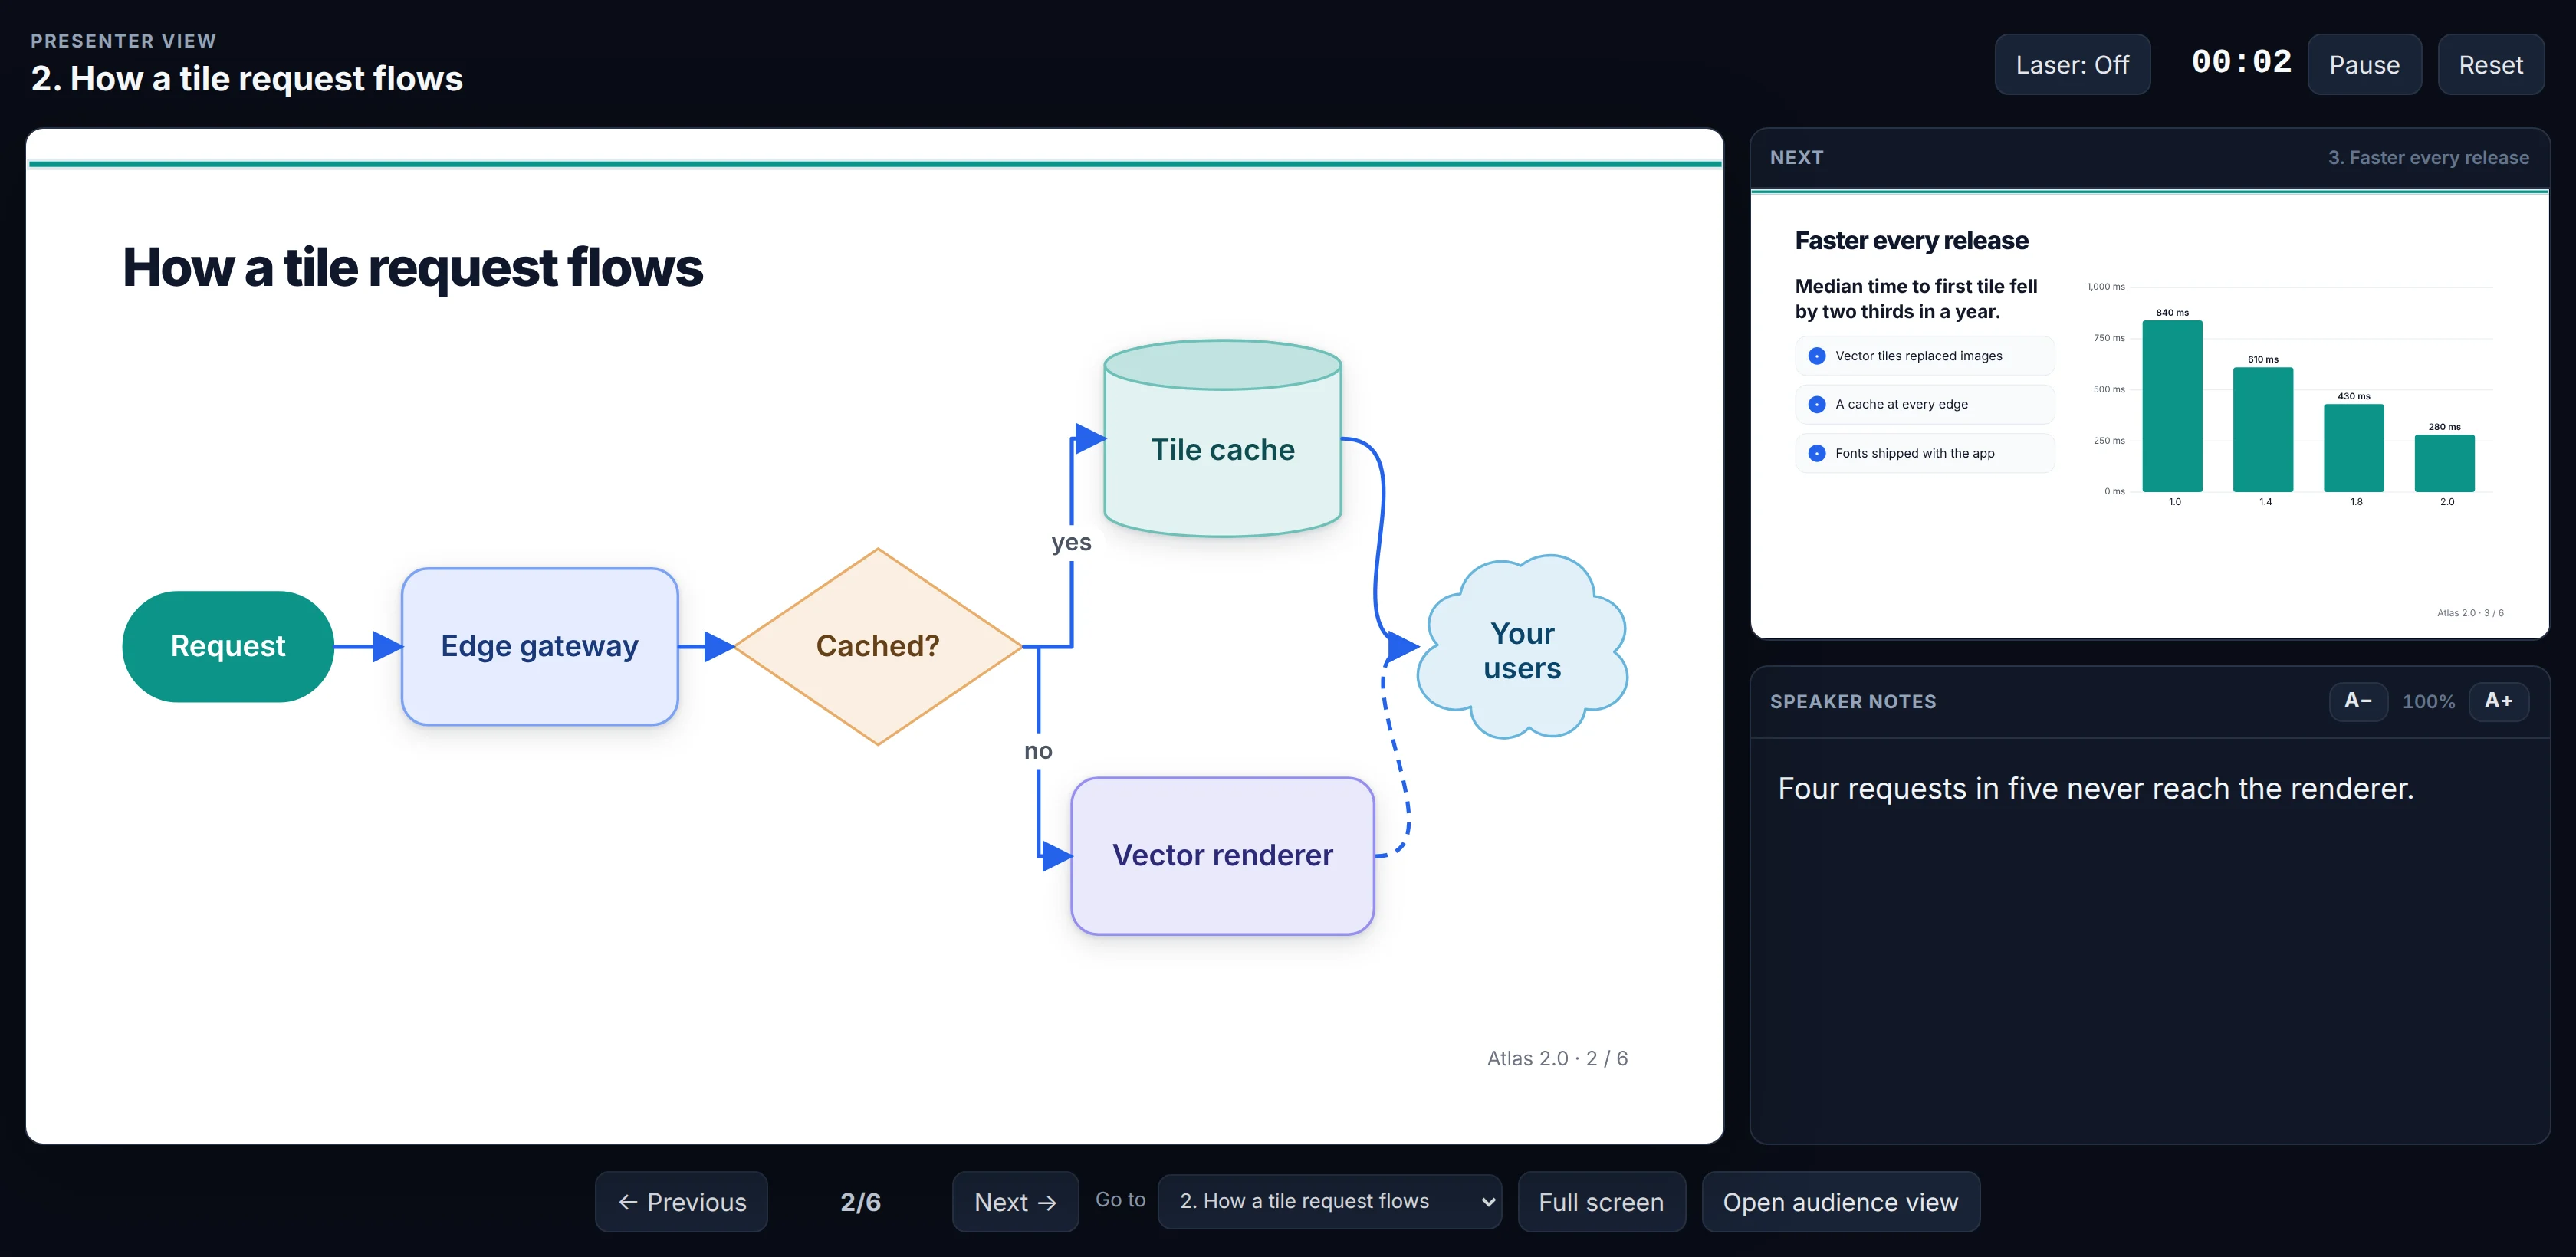
With a projector or a second screen attached, the slides go to it and presenter view stays on yours, with the notes, the next slide, and a timer. Present › Phone remote… shows a QR code: scan it with a phone on the same Wi-Fi to change slides and point a laser at the screen.
Export#
File › Export writes the presentation as:
| Export | What you get |
|---|---|
| PowerPoint, editable | Text, shapes, charts, tables, and speaker notes as PowerPoint objects anyone can edit; formulas as pictures. |
| PowerPoint, one image per slide | Exactly what the Studio shows, one picture per slide. |
| Exactly what the Studio shows; a poster at its paper size. | |
| Single HTML file, HTML site | The slides as a web page, with presenter view, for any web host. |
| Typst source | A Typst document to keep typesetting. |
PDF, PowerPoint, and Typst first ask which slides to export: all of them, the current one, or numbers such as 1-3, 5. The files go into an output folder beside the presentation, or dist for HTML, and the notice that says they are ready has Show in folder.
Ask the assistant#
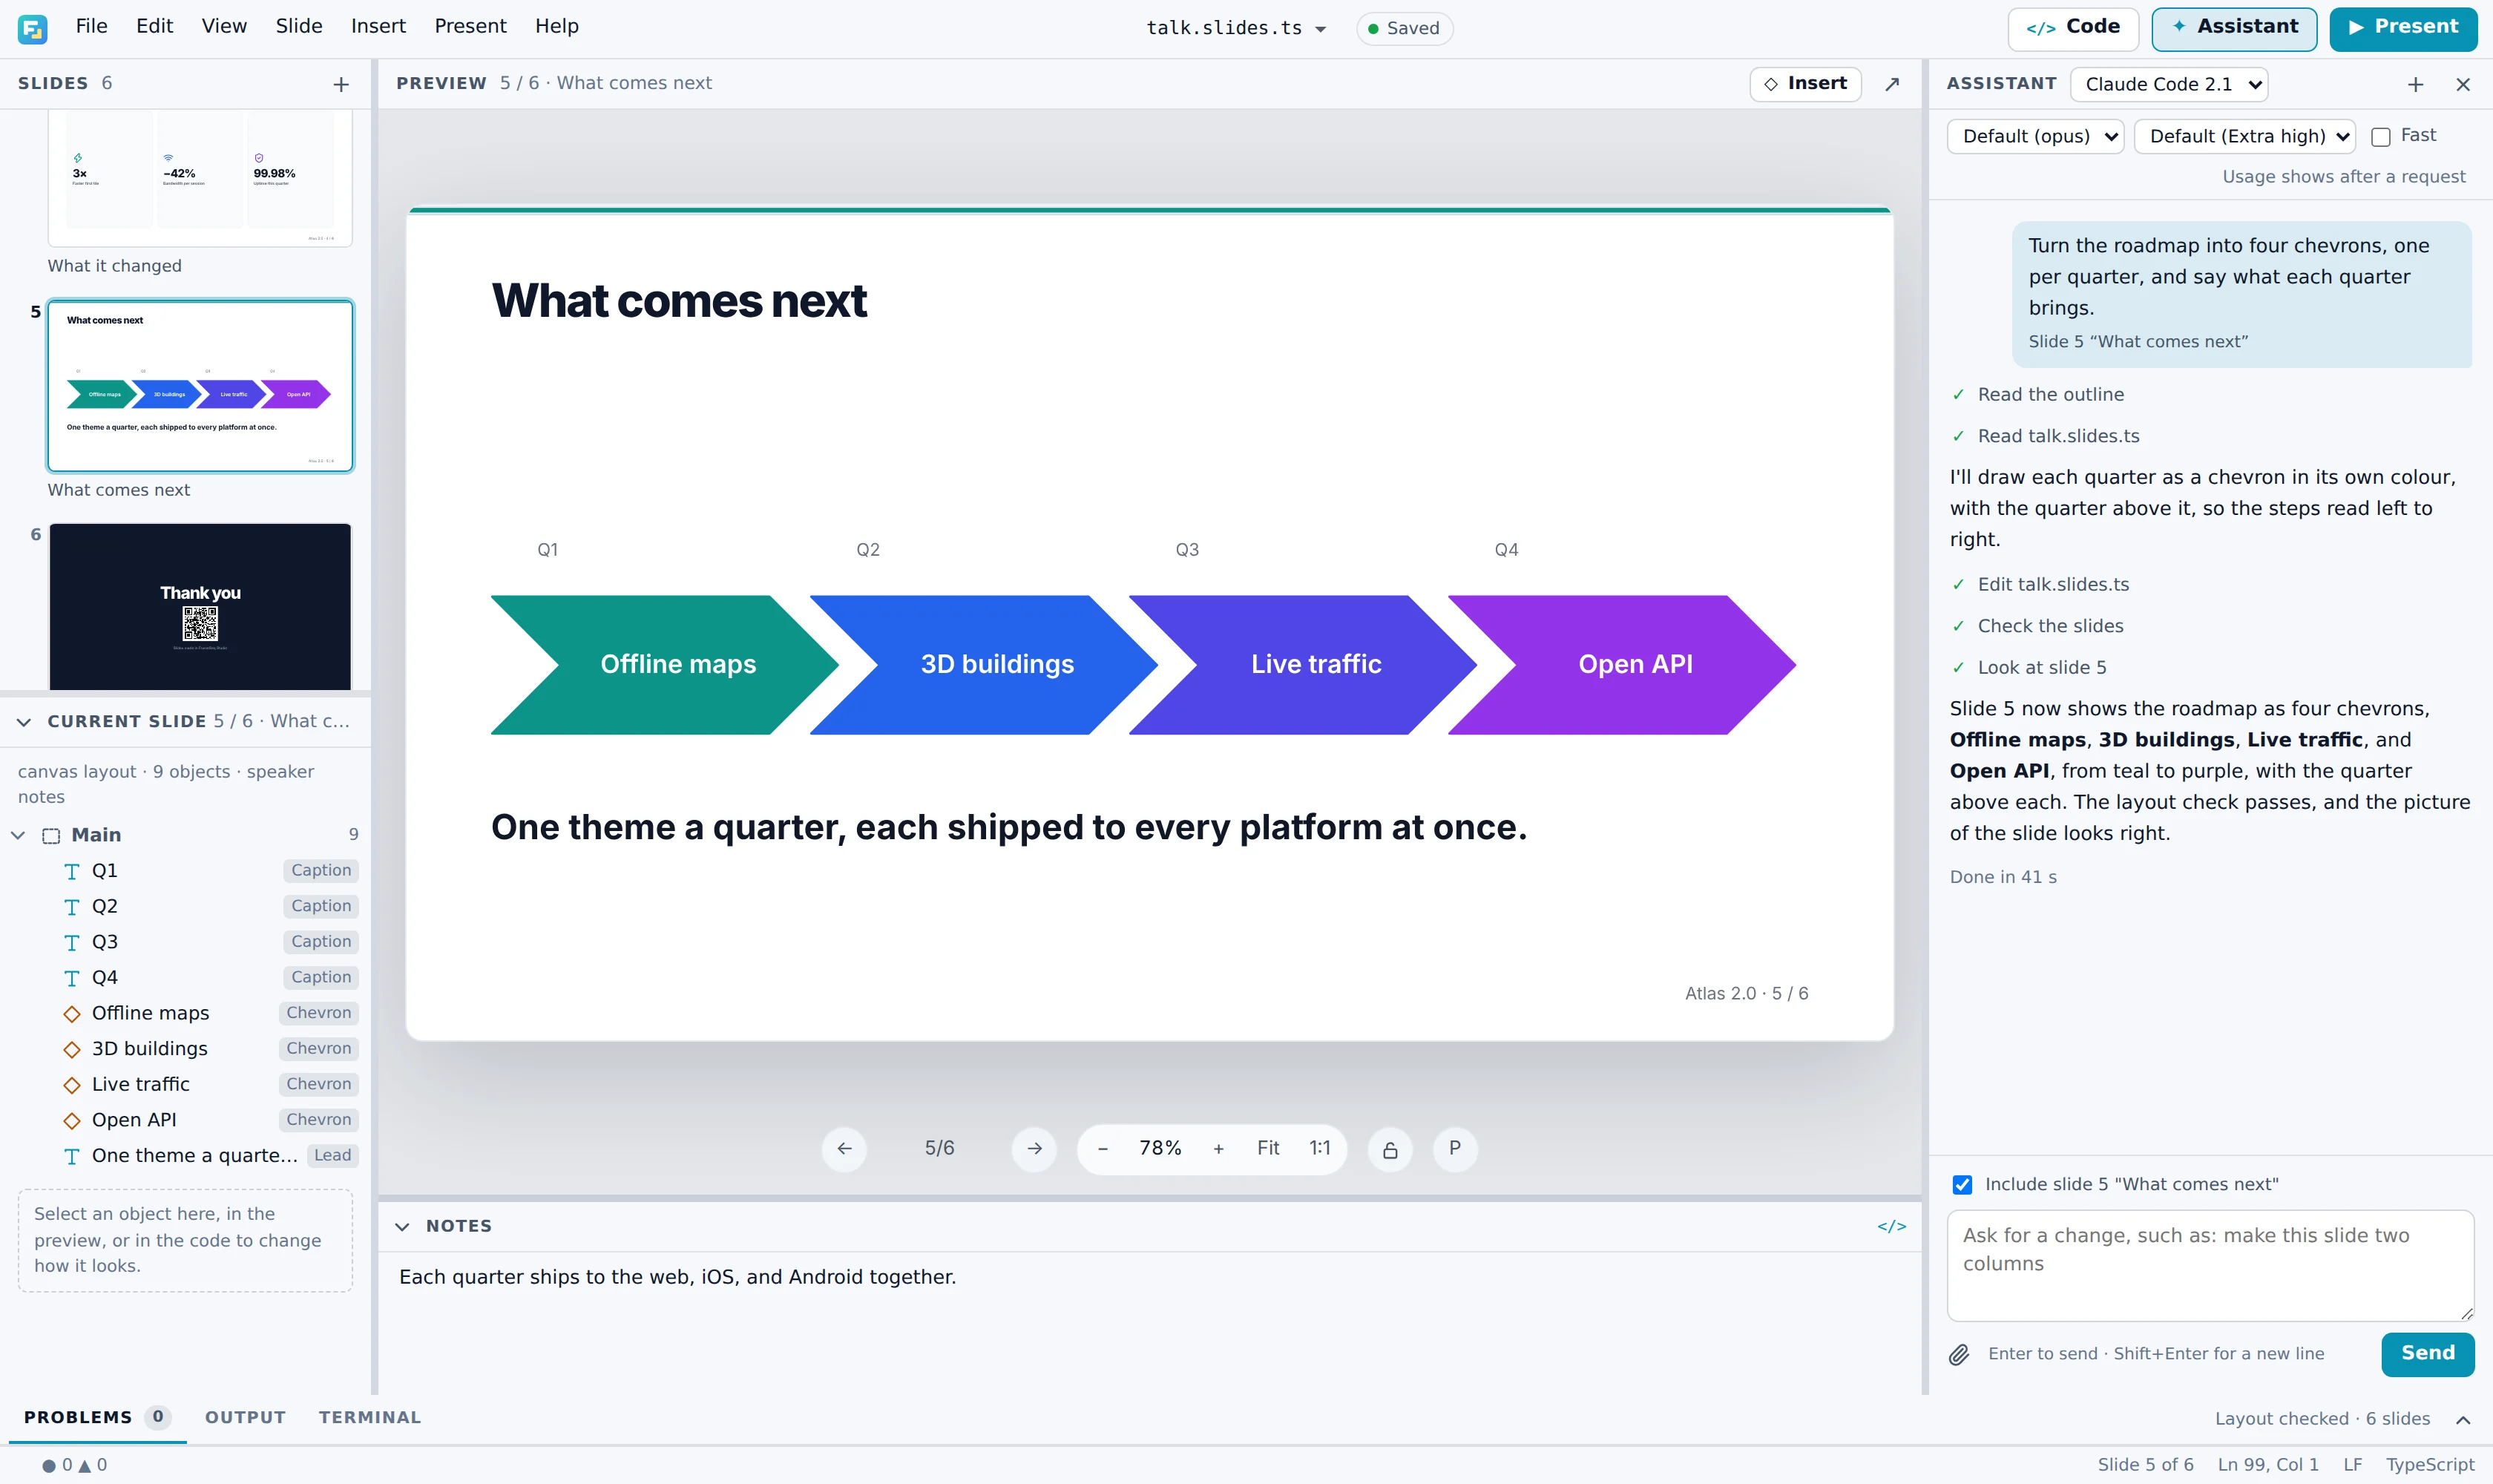
Assistant, in the top bar, opens a conversation with Claude Code or Codex, whichever this computer has, on your own sign-in. Ask for a change in your own words, such as make this slide two columns, with the chart on the right. The agent edits the slides, checks them, and looks at what it drew, and then each change waits for your Accept or Reject. Install Claude Code or Codex and sign in once in a terminal, and the panel finds it.
Next#
- FrameSeq Studio — every menu, panel, and shortcut.
- Masters and templates, Presenter and remote, and Export PowerPoint — each subject in full.
- Getting started with code and the language tour — for writing the slides as code yourself. Everything the Studio does is code you can read.